If you're here it's because you want to learn how to replace a Gameboy cartridge without losing saved data. But is that even possible? Of course, it is! Just follow these easy steps and you won't lose your precious save data ever again.
STEP 1 - GETTING THE TOOLS
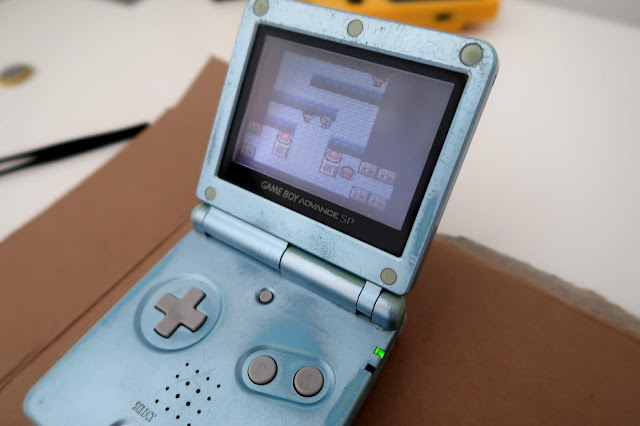
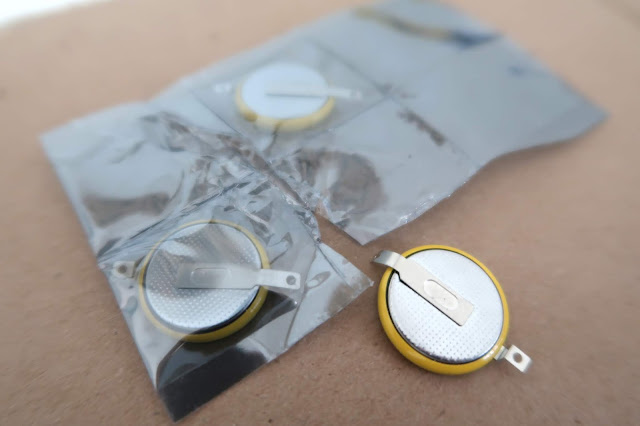
Before starting you need a couple things and the first thing you'll need is a GameBoy Advance or a Gameboy Advance SP. You can try using a regular Gameboy but you might damage it in the process.Then you'll need a Gamebit screwdriver, to open the game's cartridge, and a replacement battery, namely a CR205 battery. You can get both by following my guide on How to replace the battery of a Pokémon game.
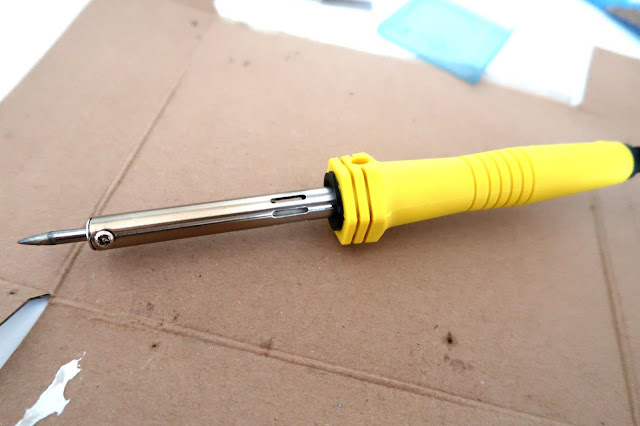
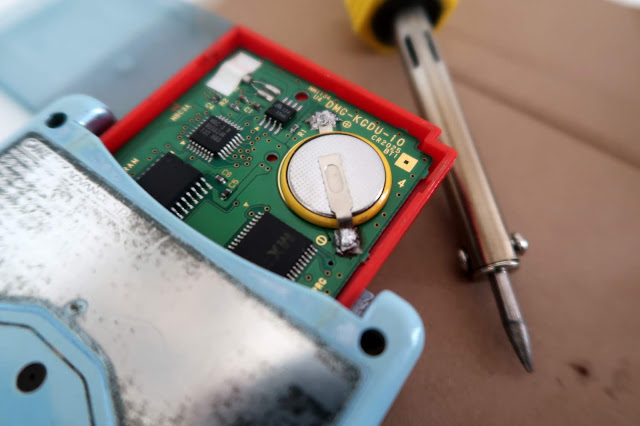
To replace the battery you'll need something to melt that solder away so obviously, a soldering iron is the answer. Just go to your local tool shop and get one, they are quite cheap. And make sure that the tip of the soldering iron is just like the one on the photo. Also, while you're at it. buy some decent solder as well.
And lastly, I recommend you get a cartridge from a game you don't mind melting a little bit, however, if you have a steady hand or just don't care about what happens to your cartridge you're welcome to skip this.
STEP 2 - SAFETY FIRST!
Soldering Irons are hot! Be very, very careful while handling them! DO NOT TOUCH ANY PART OF IT OTHER THAN THE HANDLE! If you have zero experience in handling a soldering iron I recommend watching some tutorials on youtube and practicing before trying this. Also, don't forget to place something like a piece of cardboard on your table, since you can accidentally leave a burn mark on it if the soldering iron slips you.Also, but optional, you can use some goggles and gloves.
STEP 3 - OPENING THE CARTRIDGE
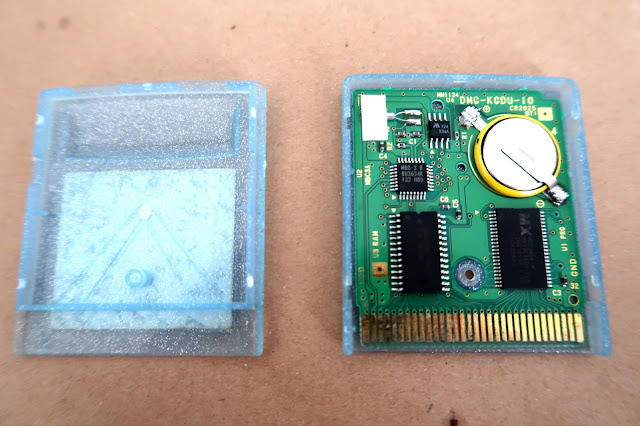
Now that you have all the tools we can start! Grab the screwdriver and remove the screws. Afterwards, slide the cover to open the cartridge. DON'T PULL IT!Then you can remove the circuit board and place it on a spare cartridge if want to.
STEP 4 - INSERT THE CARTRIDGE
This step is quite easy, all you have to do is insert the cartridge on the Gameboy. Then turn it on and load your save file.STEP 5 - REMOVE THE BATTERY AND PLACE THE NEW ONE
Before placing the battery be aware of its plus and minus side! You can try to utilize some of the remaining solder if you want to but I advise you to use some of your own to make sure the battery stays in place.
STEP 7 - SAVE THE GAME
You can now save your game and turn off your GameBoy. When turning it back on your save data should be there. If it's not it's because you didn't place the battery correctly and need to practice your soldering skills.STEP 8 - CLOSE THE CARTRIDGE
After a job well done you can just close your cartridge and enjoy a couple more years of your precious save data.Hope you've enjoyed this guide! Any questions I'm here to answer





2 Comments
Bruh no, it's possible yes but do yourself a favor and get a cart dumper. Comes with the added bonus of being able to dump the save to play on emulators or flash carts and often the ability to flash hacks and homebrews to bootleg carts, so worth it.
ReplyDeleteCan you tell me which one? Last time I searched they were a bit expensive.
Delete